Setting up Policies
Only continue with this section if you have already set up supabase locally in your project. If you have not yet set up supabase locally, please refer to the previous section for instructions.
In order to set up supabase storage in your project, you need to follow these steps:
- First, go to your local instance of Supabase client and create a new bucket. If you followed the steps in the previous section,
the url should be
http://127.0.0.1:54323/project/default/storage/.
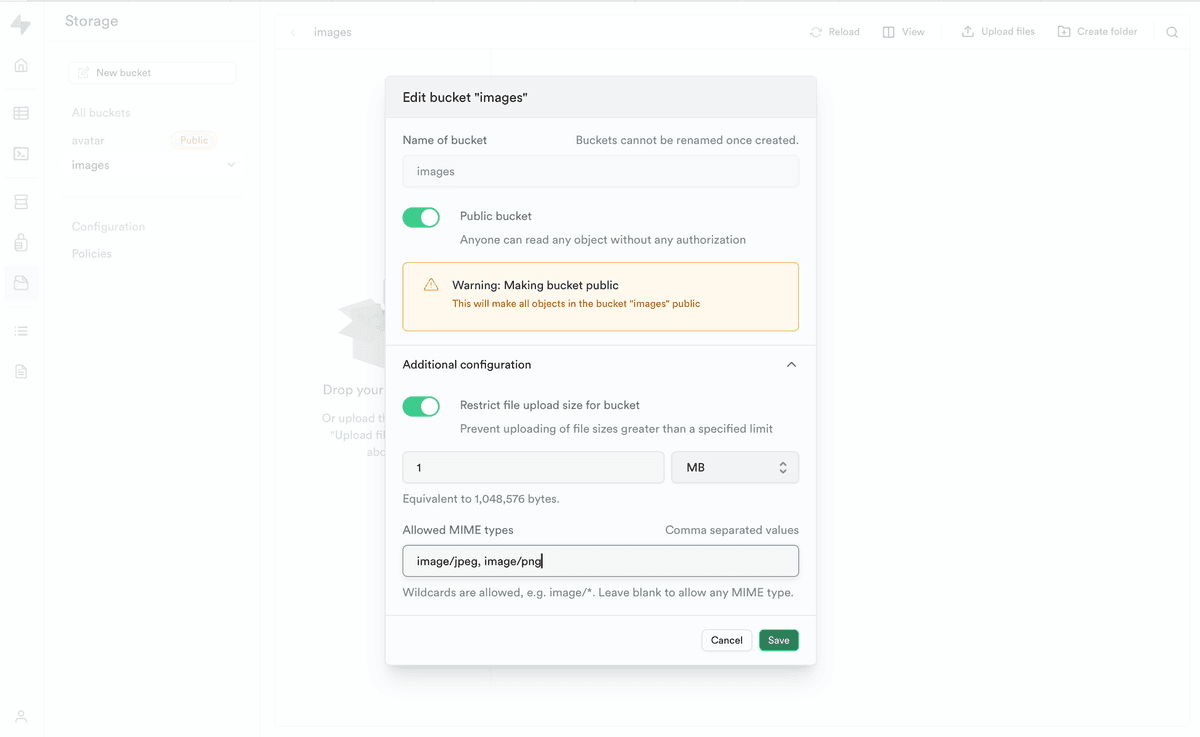
- Configure the bucket with the name "images" and the following settings, then click on the "Save" button:
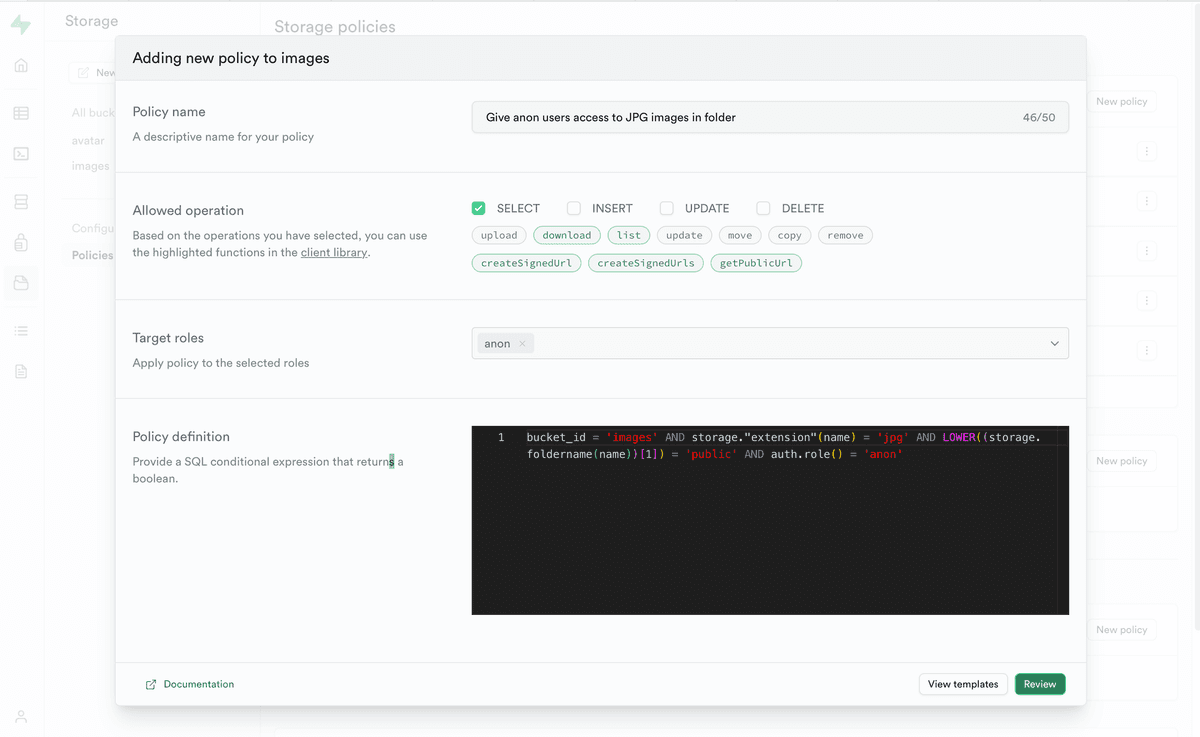
- Click on "Policies" tab in the same page and create a new policy for the bucket "images". Now we will need to add two policies here. We are adding Row Level Security (RLS) policies to our Supabase storage to control who can insert, select, update, and delete assets within our bucket.

- Click "Get started quickly" and choose the following options:
- "Allow access to JPG images in a public folder to anonymous users". Click
Selectfor the allowed operation, and chooseanonfor the target roles. Click "Review" and then "Save policy".
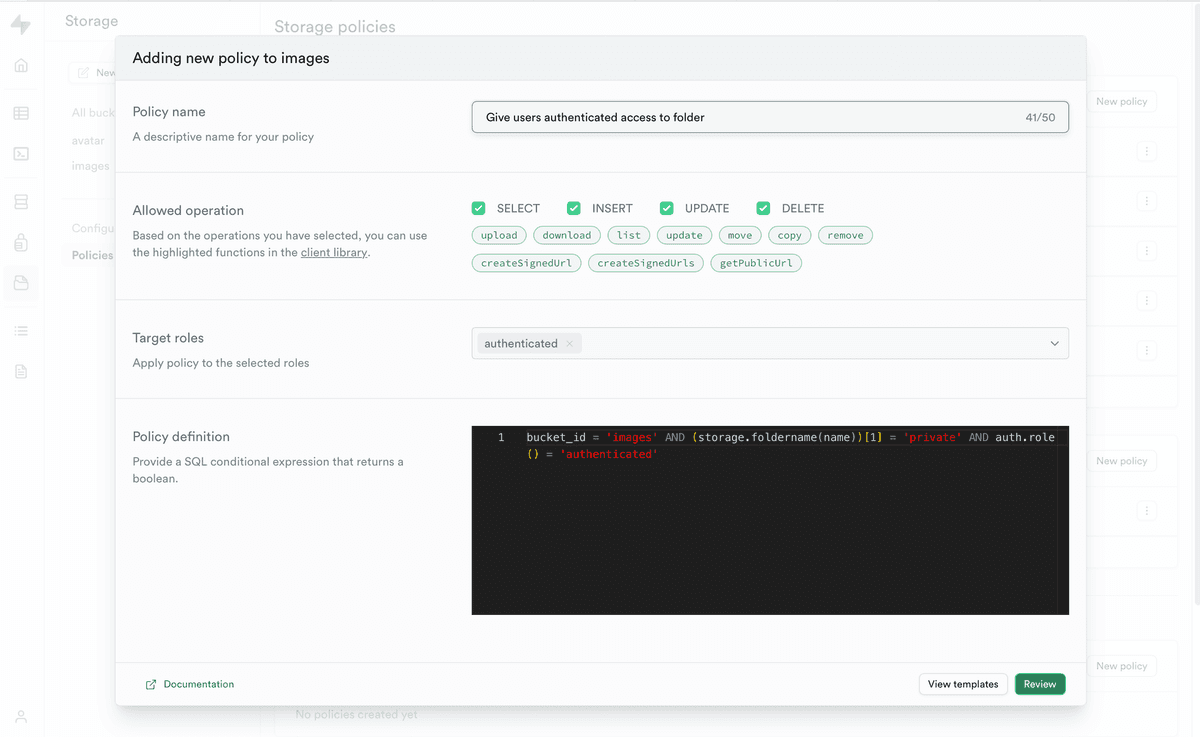
- "Give users access to a folder only to authenticated users". Click all options under the allowed operations and choose
authenticatedfor the target roles. Click "Review" and then "Save policy".
Once you've saved the policies, "Authenticated" users should be able to upload/edit/delete files in the images folder.